Fascias and Soffits - DIY Installation Guide
Fitting your own soffits and fascias is possible – with the right guidance.
Firstly, safety first! Never attempt to access the work area with an unsupported ladder or without a stable deck. Always use a full scaffold platform or purpose made cantilevered decking system with guard rails.
Secondly, consider whether you are refurbishing or replacing your fascia, as the installation instructions will differ slightly. Once you have confirmed which route you are taking, you can get started.
Replacement Fascia
Before you replace your roofline, you must ensure you frame out and prepare for the installation:
- The first two courses of tiles/slates should be taken up and set aside with a view to renewing the sarking felt. This will also allow for a full inspection of the roof rafters for signs of deterioration – any rotten ends must be cut out, repaired/replaced with treated timber to provide a suitable substructure.
- Rafters must be at maximum 600mm centres. Note: centres not exceeding 400mm are required for foiled and coloured profiles.
- When framing out of the main roof timbers is completed, rafter ends should be checked for plumb and level, to give a true line for the fascia. If necessary, suitable packers should be applied.
- Soffit bearers must be provided at max 600mm intervals (400mm for foiled and coloured soffits). A preferred method is to secure battens between the rafter foot and the wall, fixed securely at both ends and supported between these points as appropriate.
- Bargeboards at gable ends require a gable ladder or other suitable timbers to provide adequate fixing for the barge board at maximum 600mm centres. Suitable framing is also required to give adequate support at junctions between bargeboard and fascia and at hip and valley rafters.
Now you can start installing!
- Install soffit boards, nailing to each soffit bearer with 40mm Trimtop nails or capped screws. Allow the soffit board to overhang the rafter foot by 10mm to locate into the soffit groove at the rear of the fascia board.
- Fix the fascia board to each rafter end with not less than two 65mm Trimtop nails or 50mm capped screws at the recommended centres.
- Leave 4mm expansion/contraction gap at each board end and cover using matching joint and corner mouldings. Simple face fixed trims can be fixed with low modulus silicone.
- Install new Eaves Protection System (EPS) or dress sarking felt back over the new fascia and re-fix tiles/slates.
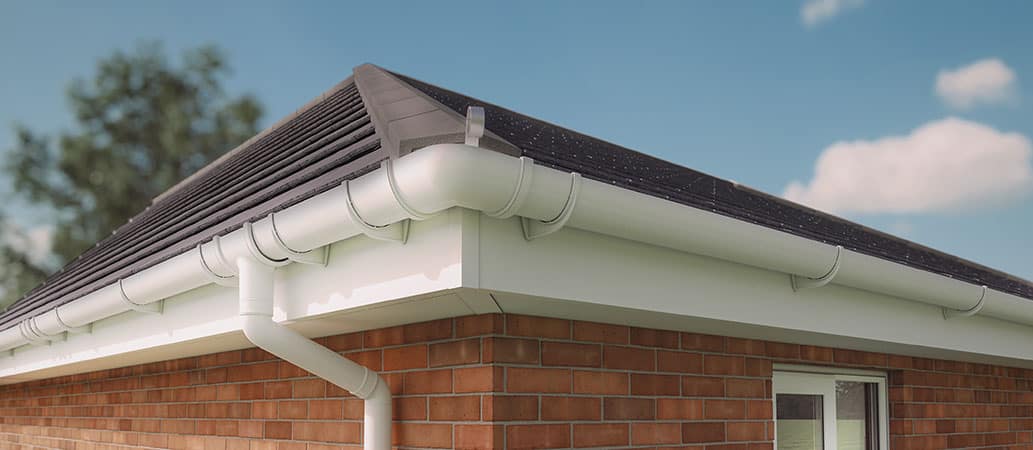
- Replace gutter assembly.
- Gutter brackets should be securely fixed through the PVC profile using A4 (stainless steel) screws in accordance with manufacturer's recommendations
Most replacement fascia boards, and foiled boards are capable of supporting the eaves course of roof covering. They are also sufficiently robust to accept direct fixing of gutter brackets for conventional domestic gutter materials.
Fascia refurbishment
If you are refurbishing your roofline, the framing out and preparatory work is slightly different:
- Where possible, the first two courses of tiles/slates should be taken up and set aside with a view to renewing the sarking felt.
- After disassembling the gutter system, existing rafters, fascias and bargeboards should be checked for condition and secureness of fixing. Any showing signs of rot should be cut out and replaced with treated timber.
- If completely rotten a new backboard of not less than 12mm marine plywood should be installed.
- Soffit boards and bearers should be similarly inspected and replaced or supplemented. New timbers should provide support which is at least the equal of that required for new-build work.
- Soffits should be checked for line and level and suitable packers applied where required.
- All new timbers should be preservative treated.
Now you are ready to refurbish!
- Install soffit boards by nailing to the existing soffit or each soffit bearer with 40mm Trimtop nails or capped screws.
- If the existing soffit is to be retained and requires new roof space ventilation, drill 70mm diameter holes and fix circular soffit ventilators at required centres.
- Select the appropriate height of the profile, having regard to the required details at roof oversail and soffit board locations.
- Fix the profiles over the backboard with not less than two 50mm Trimtop nails or 40mm capped screws at the recommended centres and at all plank ends. An 8mm gap should be left between plank lengths.
- Simple face fixed joint and corner trims can be fixed with low modulus silicone.
- Dress sarking felt back over the new fascia, replacing any damaged areas, and re-fix tiles/slates.
- Replace gutter assembly.
If you are installing your new PVC fascia and soffit onto either a pitched or flat roof, be aware that there are specific installation instructions that you should consider. This guide also provides extra detail to ensure your installation goes smoothly and seamlessly.
If you’re still unsure where to start, talk to a reputable local installer, who will be able to lend a professional hand.